


Most crispy bacon recipes are tailored for streaky rashers, with few suitable for thick-cut back bacon. However, British cooking icon Mary Berry has revealed her go-to method to serve those of us who prefer the meaty taste of back bacon, which is more popular in the UK.
Sharing a recipe for ‘crisp bacon rosti with fried eggs’ from her cookbook Mary Berry Everyday, Mary claimed pan frying is the best approach for meaty rashers. It’s a little different to how I’d normally cook bacon myself, having grown up with a dad who has mastered the art of perfectly crunchy bacon cooked on greaseproof paper in the oven. It’s a foolproof method if you have the patience to wait for it to crisp up, but I thought I’d try Mary’s supposedly quicker approach, all in the name of journalism.
Mary’s method is simple. She says all you need is a lidded, non-stick frying pan, sunflower oil, and a few rashers of back bacon.
The chef recommends chopping the rashers into small pieces for her potato rosti recipe but keeping them whole for other dishes, as I did on my mission to make tasty bacon sandwiches.
I cooked eight rashers to test the method, which serves two to four people, depending on how many bits of bacon you enjoy. I admit that the pan looked a little overloaded initially, but everyone knows how much bacon shrinks when fried.
How to cook crispy bacon
Add one tablespoon of sunflower oil to a non-stick frying pan with a suitable lid. According to Mary, sunflower oil is much better than olive oil as it gets hotter for crispier results.
Turn the heat to high and let the oil warm up.
When the oil is hot, carefully add the bacon and leave to cook over high heat “until crisp”, Mary said. It is as simple as that.
As for timings, chopped-up bacon bits take just a few minutes to cook, as stated in Mary’s recipe, but the whole rashers took a whopping 29 minutes, according to my stopwatch.
I left them undisturbed to cook for 10 minutes before flipping and was unimpressed by the progress. However, this is likely due to cooking a much larger quantity of bacon than the two rashers suggested in the rosti recipe. At the 10-minute mark, the pan was very oily, and the bacon was an unappetising pale pink colour. The rind was still very white and creamy-looking.
I returned the lid to the pan to cook for another 10 minutes before flipping the rashers again, by which point the first hints of crispiness appeared.
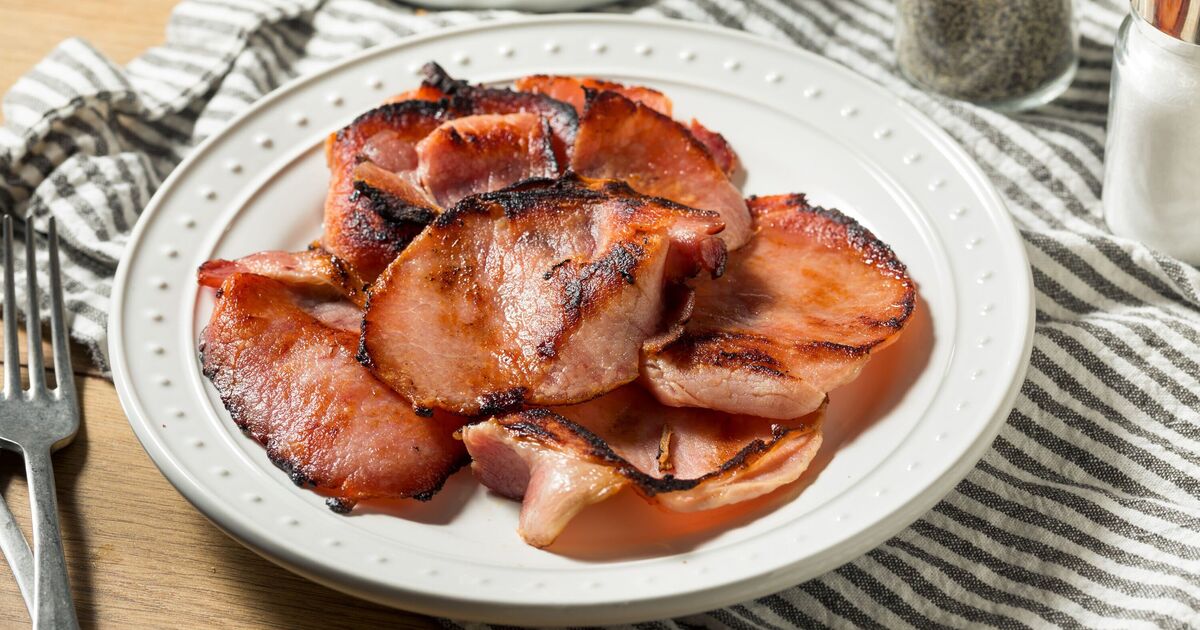
After 29 minutes, I was pleased to see that the bacon was crispy and of a nice, deep colour. However, I am unimpressed by this method overall.
Unlike the trusty oven method, it wasn’t that quick, and you are limited in the quantity of bacon you can cook at once, so it’s not suitable for larger households.
However, the simplicity of throwing oil in a pan and leaving it to sizzle away is desirable if you don’t want to turn the oven on, particularly if you’re already cooking a fry-up on the hob.
The final result was slightly uneven, with some rashers much more crunchy than others, and the fat wasn’t completely rendered compared to the rate at which the rest of the bacon was cooked.
It was perfectly tasty and worked well in a bacon sandwich, for which my dad opted for sourdough slathered with butter and English mustard. I went for seeded brown bread and a light layer of English Mustard plus HP sauce. After all, if you are going to eat bacon, you may as well go all out.
Admittedly, I have yet to be converted to cooking bacon this way. The oven method takes just as much time and produces far better results. Cooking bacon in the oven results in much more evenly crisp rashers and less shrinking as the bacon cooks.
Another clear winner on the oven-cooking front is that you don’t need to cook the bacon in any extra fat, like sunflower oil. The oven does all the hard work for you.